Check out pages are one of the main reason for increased cart abandonment. Likewise, it can be the best revenue driving page in your store if you customize WooCommerce checkout pages. And there are 2 possible ways by which you can customize WooCommerce checkout pages. You can either use plugins such as WooCommerce checkout manage plugin. Or you can do it by inserting custom codes. And this says about the scalability and flexibility of WooCommerce.
Let’s dive into deeper ways how you can customize the checkout page.
Starting with the Plugins:
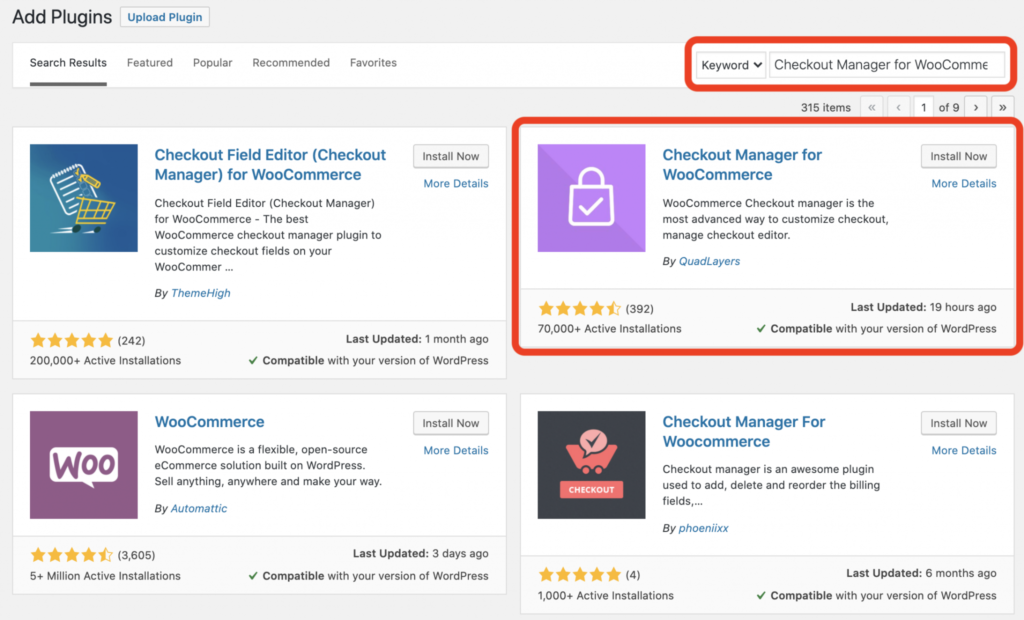
1. WooCommerce Checkout Manager
By using WooCommerce checkout manager you can customize and manage the checkout fields on your WooCommerce page. You can change the fields, re-order, remove fields from the checkout page.
And this is how you integrate WooCommerce checkout Manager with your WooCommerce store.
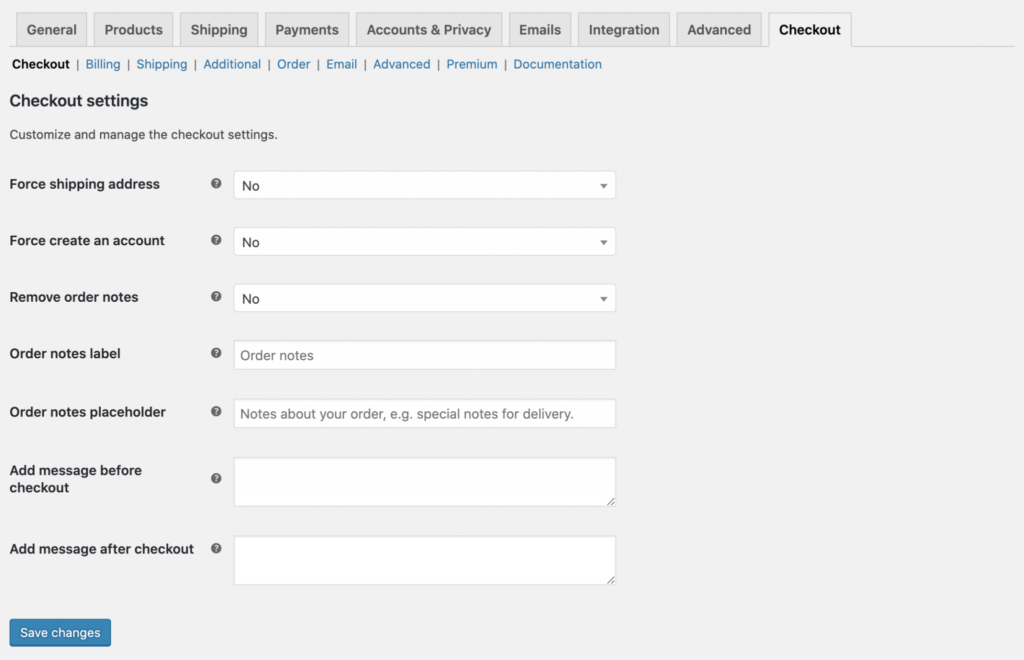
You can search for ‘WooCommerce checkout manager‘ in the plugin page and install it from there. Followed by this step you can click on the WooCheckout option. You can add fields and click on ‘ save changes’ button,
Now you can see all the changes in the checkout page, that you have made from the dashboard.
2. WooCommerce Checkout Add-ons and Upsells
This WooCommerce extension lets you customize WooCommerce checkout pages quickly. It comes with other functionalities other than adding checkout fields. Using this plugin, you can upsell products by displaying them on the checkout pages.
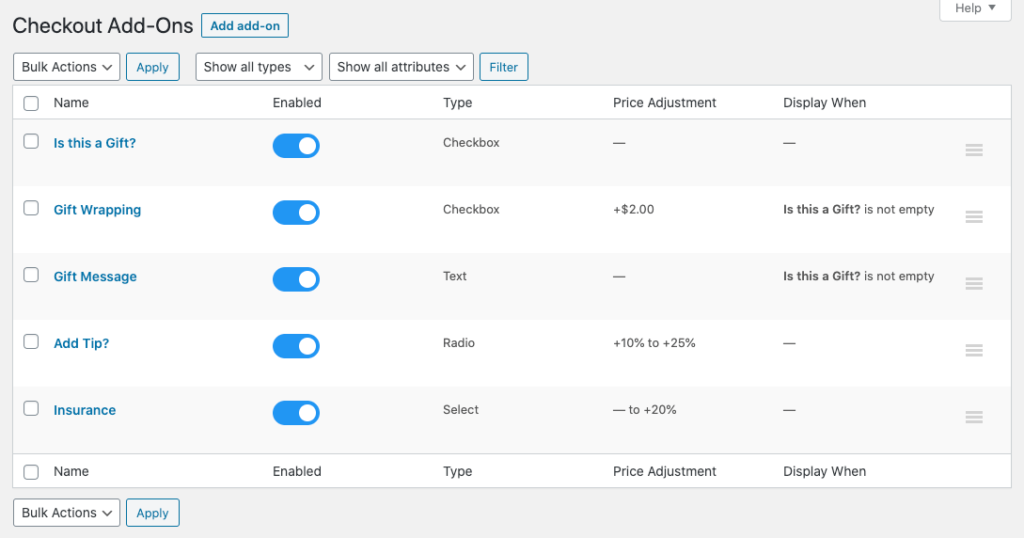
The highlight advantage of customizing WooCommerce checkout using this plugin is, you can display custom checkout fields based on products in the cart.
Just as WooCommerce checkout manager, you can download and upload the plugin in your WooCommerce store
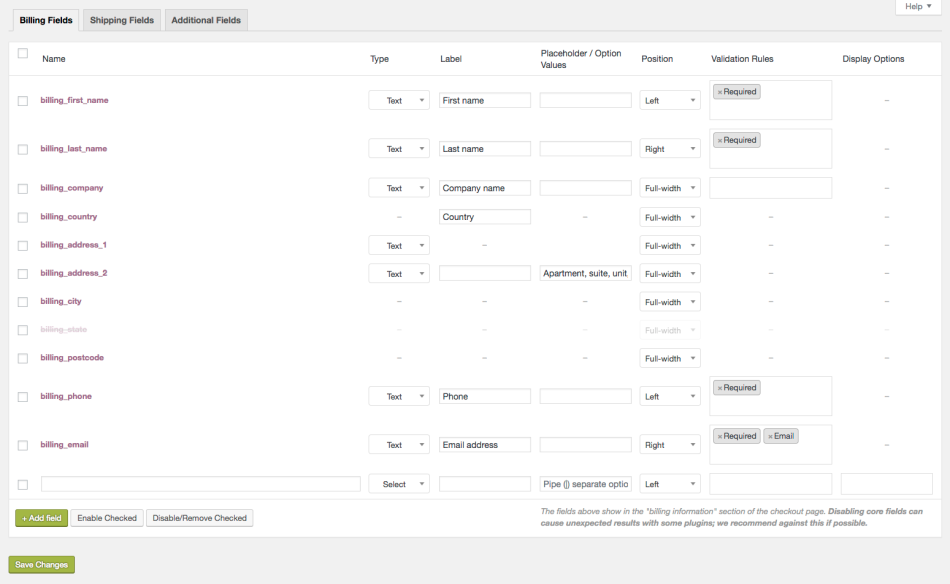
3. Checkout Field editor
Using Checkout Field editor you can add, edit, remove fields in your WooCommerce checkout page. The fields that you can edit in the checkout field include billing, shipping, and additional section.
To activate the plugin in your WooCommerce store, You can download the zip file from your WooCommerce account. Followed by this you can upload and install the plugin from your website dashboard.
Login to your WordPress Admin Account> Click on plugins> select ‘add new plugin‘> choose Upload plugin. And upload the Zip file that you have downloaded. And now you can install and activate the plugin.
4. Flexible checkout Fields for WooCommerce

You can edit all the default fields in the WooCommerce checkout page. You can change the label, delete and hide them. Moreover, you can add new fields in the checkout field. By just dragging and dropping, you can rearrange the fields in the checkout page.
You can customize the labels in the checkout fields. This can also be done inserting HTML codes inside the labels. In case if you don’t want to show any fields in the checkout page, you can hide them using this plugin.

The pro version of the plugin includes conditional logic for products and categories that you
Customizing WooCommerce checkout for Apps
If you have converted your WooCommerce website into the app using Appmaker.xyz, Your app gets integrated with all of the above-mentioned plugins. This is because WooCommerce appmaker already supports 100+ WooCommerce plugins and all the plugins that you have in your Woocommerce site get automatically integrated with the Woocommerce app. Appmaker lets you customize Woocommerce checkout fields in a much easier way. The app managing dashboard provided by appmaker is codeless, which makes it easier for you to manage the plugins and extensions in your WooCommerce native app.
Have not tried WooCommerce appmaker? It’s not just the check fields,m you can customize the whole app by just dragging and dropping.


No Comments
Leave a comment Cancel