Have you been looking for a plugin where you can add or edit the checkout fields? Well, then, we can help you get the right choice. Checkout Field Editor for WooCommerce plugin provides you the freedom to add, remove, and edit the fields in the checkout page. You can manage your checkout page and decide what fields need to be mandatory and what doesn’t. Let’s get a better look of this plugin.

Tell me more…
With the Checkout Field Editor For WooCommerce plugin, you can perform some really cool features –
- Add custom fields
- Edit existing fields
- Remove fields
- Manage the order of the fields
- Display and decide what fields to be displayed in the order page
Now that you know what features you can utilize, let’s begin with setting up the plugin.
Let’s begin
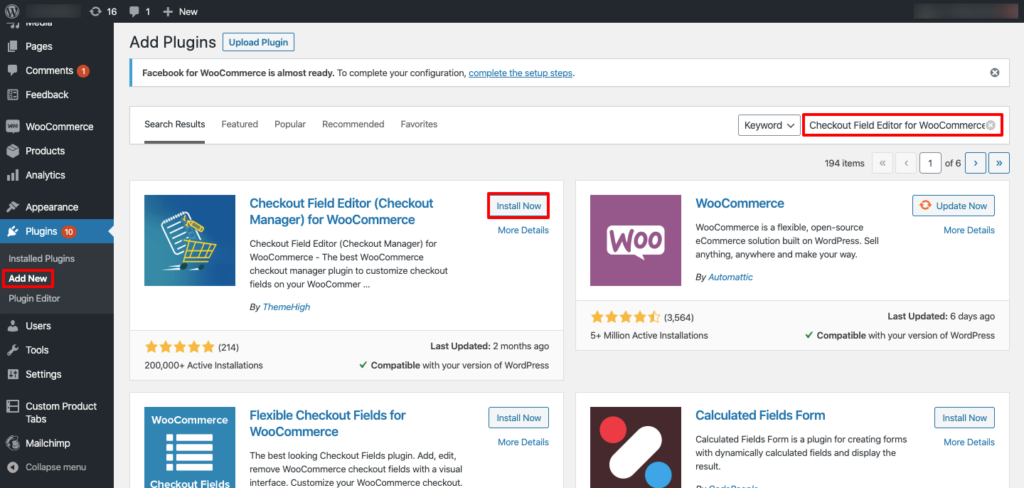
Go to your WordPress dashboard. Click on ‘Add new’ option in the Plugins tab and search for the plugin. Once you get the correct plugin, click on Install now and Activate the plugin.

Once the plugin is installed and activated, go to its Settings.
Know the Checkout Field Editor for WooCommerce plugin
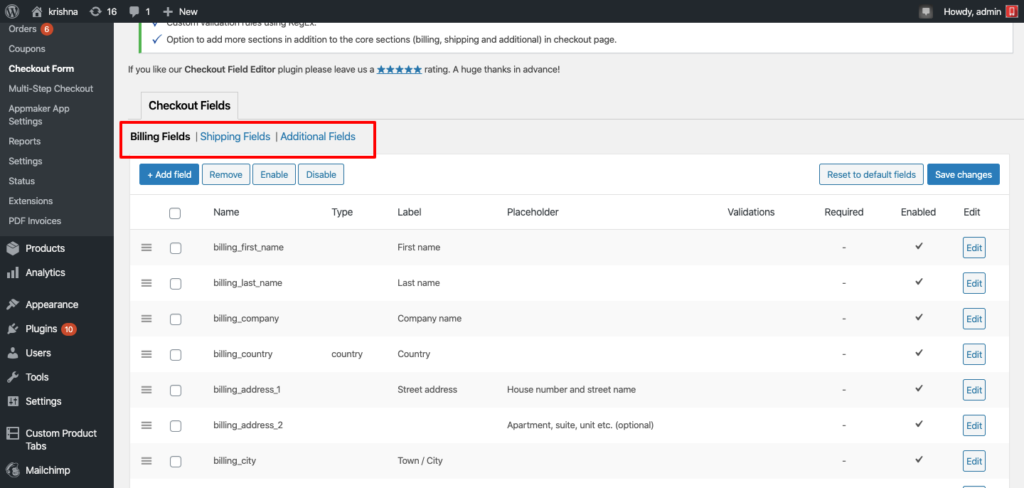
In the Settings page, you can mainly manage three areas –
- Billing fields – All fields related to the billing section. Include the name, company, address, email, etc.
- Shipping fields – All fields related to the Shipping section. These fields include the name, company, address , etc.
- Additional fields – This section includes the additional fields that you want to show in the checkout field apart from the ones that already exist. For example, the order comments.

In all these tabs, you can add, remove, enable, disable and even edit the fields.
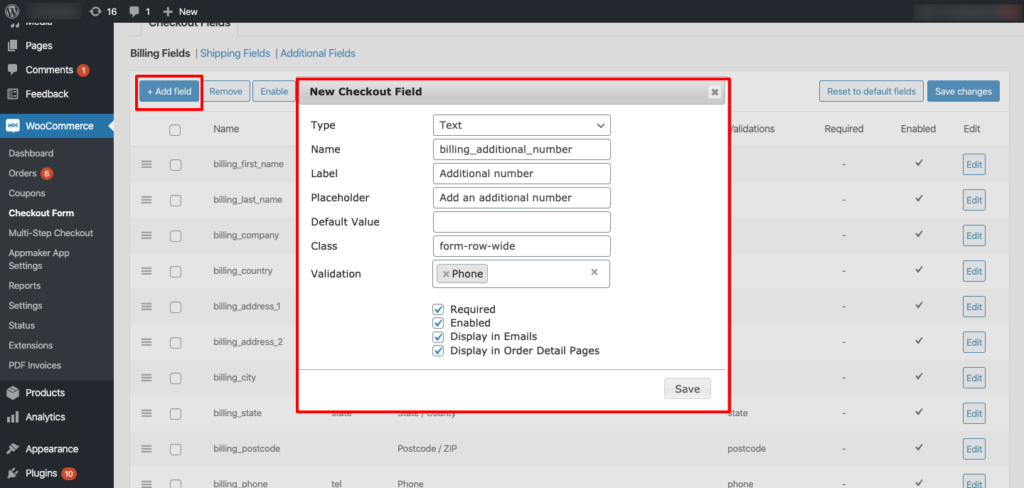
Let us consider you want to add an additional field in the Billing section. Just click on Add field.

A similar pop-up box will appear as in the above image. Type in all the details you need. Add a name for the field that you can identify with. Add a label name that will be shown to the customer. Next, Placeholder refers to the message inside the field to make the customer understand better what that particular field is about. Add a default value if needed. Add a validation. In the above example, I am adding a field for a second phone number. So the customer will have to provide an additional phone number.
Once you are done, click on Save and that is it! Manage all the fields in one go.
Try this plugin now!
Use this plugin now to manage and control all that is there in your checkout page.


No Comments
Leave a comment Cancel