Google Shopping Ads is a Google platform that gives you a chance to drive more traffic to your products, as well as an opportunity to increase conversion rates. By setting up Google Ads, you can show your products above other results once a visitor types in a keyword you have chosen to display your products for.
As an online retailer, you basically live off ads and your products’ visibility. However, being visible in today’s world is hard as the competition keeps growing every day. There are thousands of new products and thousands of retailers fighting to get customers’ attention.
By having your products shown first, you will drive more traffic to them as it is known that visitors mostly click on the first few search results. You will also grab more attention if you use images and will get better quality leads since the price is already shown so you know the customer is interested to buy the product. Your conversion rates can increase and you can have a greater and broader reach with a high search volume. Hence, setting up Google Shopping Ads is beneficial, but it must be done properly.
Here, we will guide you step by step on how to set up Google Shopping Ads.
But, first, let’s start with the basics.
What are Google shopping ads?
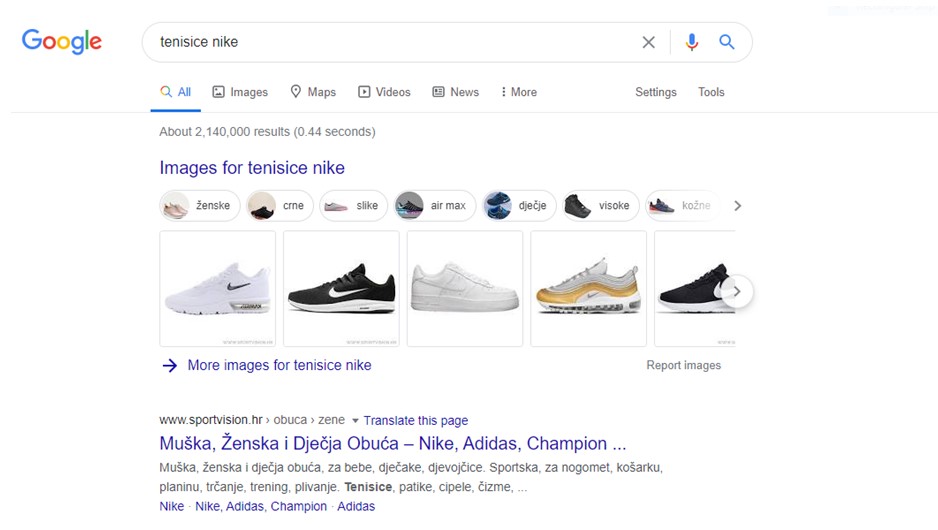
Google Ads or AdWords is an advertising service provided by Google. It provides businesses with the ability to advertise their products or services under specific keywords. The results will be shown below the search bar, once the visitor searcher for a keyword (for example, Nike shoes).
You, as the owner of the store or website, have a lot of choices when it comes to choosing where and how you want to portray or display your ads. You also need to enter your budget for the ads and your goals for the ad (this means what you wish to achieve with the ad, for example, get more calls, more visitors to the actual physical store, or simply get more sales).
Now, specifically, Google Shopping Ads (or Product Listing Ads) are ads that appear above the search results for products, or even more specific, ads that appear mostly for product-focused searches. In short, if someone is looking for a product, let’s say Nike shoes, the first few results are the ones most likely to get more clicks.
There are several things that are really important once you set up Google Shopping ads:
- Creating product feeds- this can be done manually or with a plugin (we talk about this in more detail further down in the article)
- Local ads- sell your products locally (Google likes to support local businesses and help you generate revenue in your area)
- Get a “Trusted Store” label which boosts your ratings, rankings, and market presence
- Secured payments (since most payments are done online, you need to ensure the payment process is safe and secure)
- Advertising- specifically dynamic remarketing that lets you show your previous visitors ads based on the products or services they viewed while on your site (this helps you bring a more personalized message to your audience and increase sales)
How to Set Up WooCommerce Google Ads?
Before setting up the Google Ads, hopefully, you already have a WooCommerce store ready, along with a product catalog. In short, you need a WooCommerce plugin, install recommended extensions, set up shipping zones, payment options, etc. and verify that all the pages are working.
Also, going online doesn’t mean only a website. To drive the attention of more customers and retain them, you need to have mobile compatibility too. The possible way of presenting your brand in 2020 is by going mCommerce. Mobile apps will be much convenient for your users comparing with a website. You can create mobile apps for your WooCommerce store easily.
But, before doing anything on your WordPress site, make sure you have WP Reset ready. Instead of something going wrong, you will be always ready to roll back like nothing happened and start over.
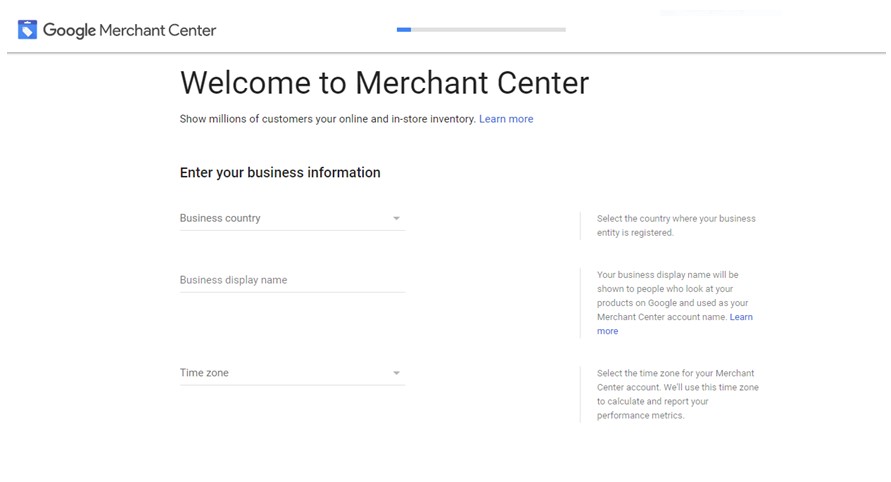
Next, you need to use a Merchant Center, a platform that helps you show your products on Google. This platform helps you organize and list your products and the details about your products in a simplified way to get them displayed to your visitors. You can enter information such as availability, price, colour, and size.
This platform also lets you display your products on other channels, paid or unpaid, by showing them across other Google services, Shopping Ads, Shopping Actions, or local promotions. It is available in more than 90 countries so you can sell your products globally or set up promotions. After some time, you can also see statistics to check how you are doing and what needs to change.

Here you need to make an account and enter some basic info about your business, such as the country, name, and time zone. Then, you select the Shopping Ads option and choose which programs fit your objectives for the ads (you can set up campaigns, specific ads, or focus on shopping actions with product feeds and listings).
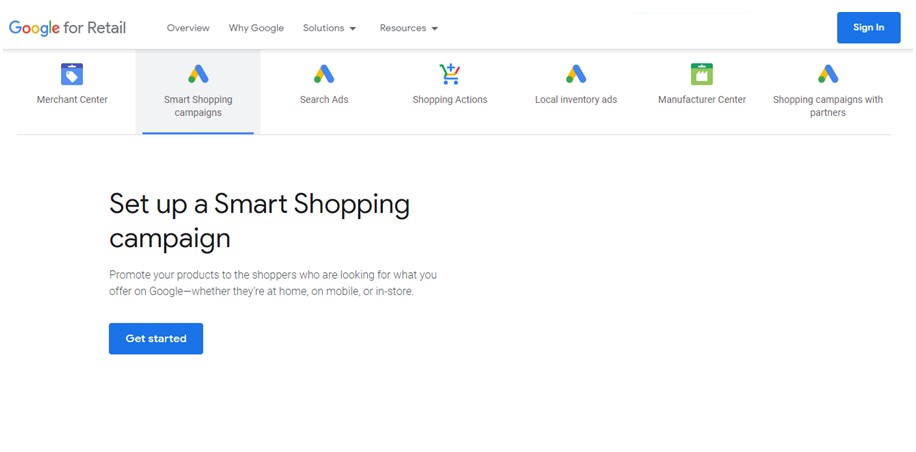
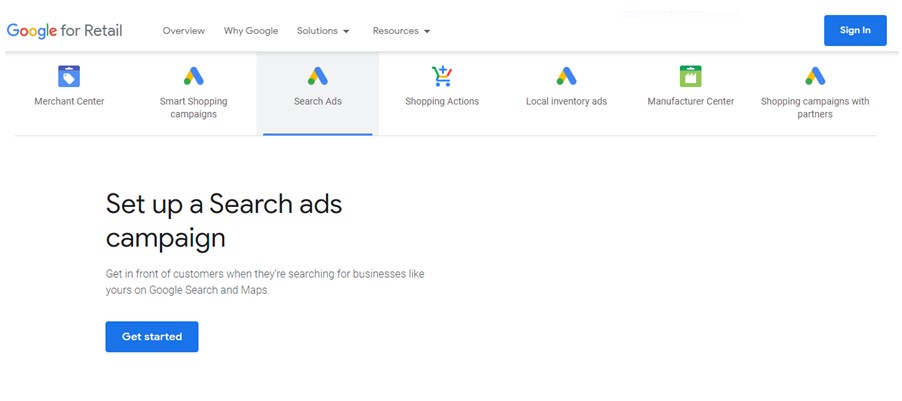
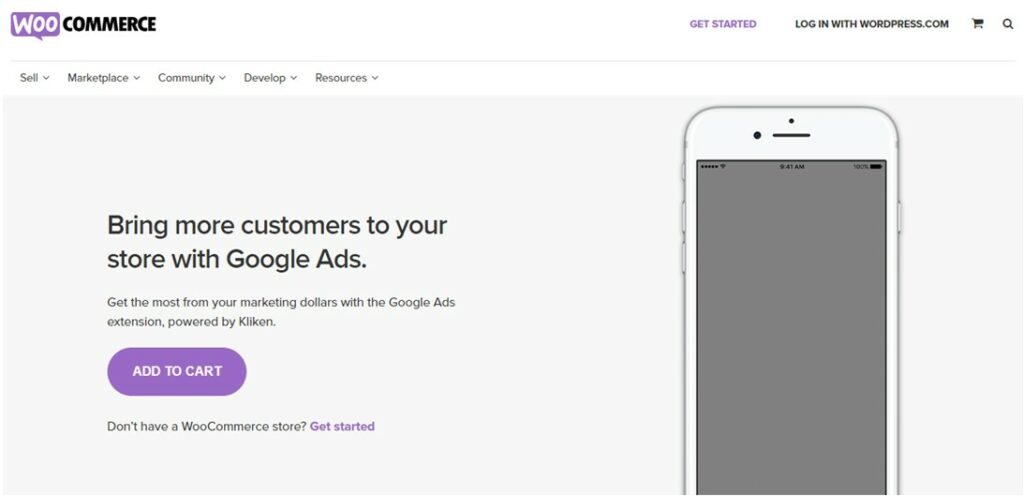
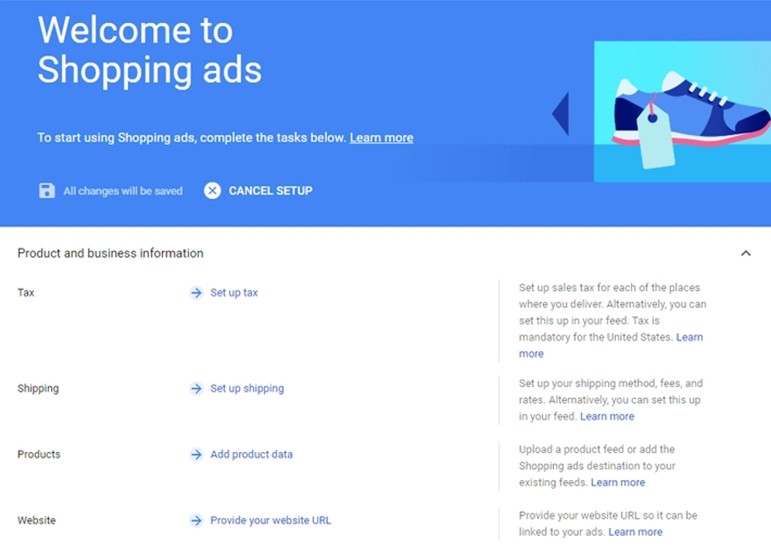
The second and third images show you where you need to go to set up campaigns and ads for Google Ads. You also have other options, such as setting up local ads, manufacturer center, or set up shopping ads with partners to boost your visibility even more.
Click on the get started button and this is where it leads you:
Once you click on the get started button, you need to import your WooCommerce data about your products to the Merchant Center. This can be done in two ways:
- You can enter the information manually by creating a spreadsheet of links to each product page
- Use a plugin (here you don’t need a Merchant Center account)
- Here is the tutorial for the manual set up:
After you sign up for Merchant Center, you will see a dashboard. Click on Products then Feed. There, you will see an overview of all of the products you have imported (it will be empty if you are just starting this). To import, click on the plus sign, choose where you want to ship your products and in what language you want the add to appear.
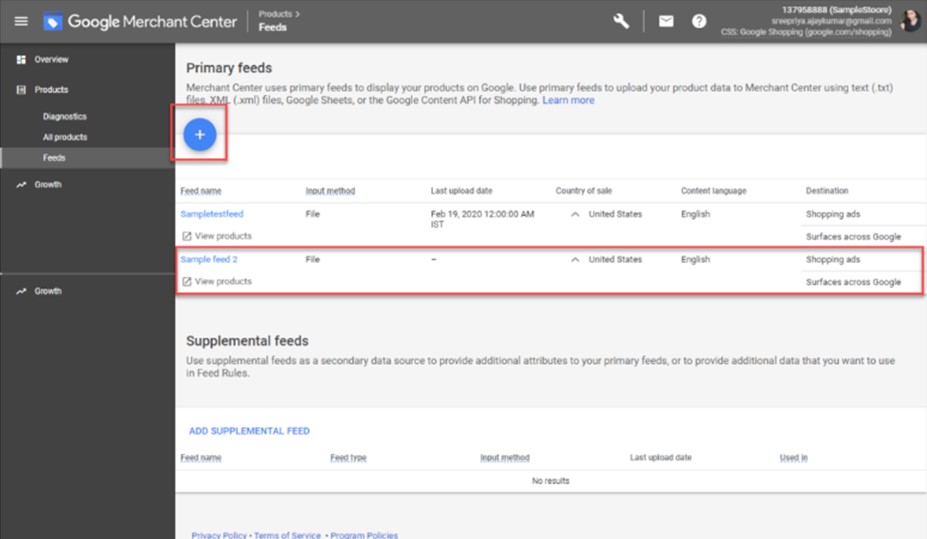
Then, choose how you want to upload the data about the product, such as the Google Sheets, Upload, Content API, or Scheduled fetch. Next, you choose to create a new template or use an existing spreadsheet. You can access this template from the Products-> Feed tab.
On the spreadsheet, enter your product’s ID, description, title, price, and links (hopefully you will have set up the products landing page so link to that URL). You can find more detailed instructions on Google Sheets here.
Product feeds- the basics
- Your product title should have less than 150 characters (make it short, informative, and easily read, for example, Men White Polo Shirt)
- Your product description should have max 5,000 characters (use relevant and important information that can set you apart from your competitors, for example, made from 100% organic cotton, this pure white shirt has a slim fit and the logo embroidered on the chest, machine wash)
- Product image (hopefully you will add more than 1 image from different angles so your customers can really envision the product; make them look appealing)
- Price, the global trade item number (this refers to the product’s UPC, EAN, or ISBN reference)
- The brand, the product category, and the manufacturer part number (SKU).
- If you are selling accessories, you should also add the colour, material, patterns, size, and gender to the product listing. In short, include as many details as possible, but make them relevant.
The feeds are supported in two formats: plain text and XML. XML format gives you the chance to add more data and it includes images, while plain text files are smaller and simpler. Naturally, you want to go for the XML formats.
Once you finish this, go to your dashboard and under Feed select the option to Fetch Now. This will upload your WooCommerce info to the Merchant Center.
- Here is the tutorial for the plugin step if you want to use a plugin/extension:
There are numerous plugins you can use to add your WooCommerce data to the Google Merchant Account. Google Ads for WooCommerce is the extension you might want to use. The plugin is free to install, but the service that manages your Google Ads charges a fee.
There is another great plugin you can try, ELEX WooCommerce Shopping Plugin, great for creating Google Product feeds. However, in this article, we will focus on Google Ads for the WooCommerce plugin tutorial.
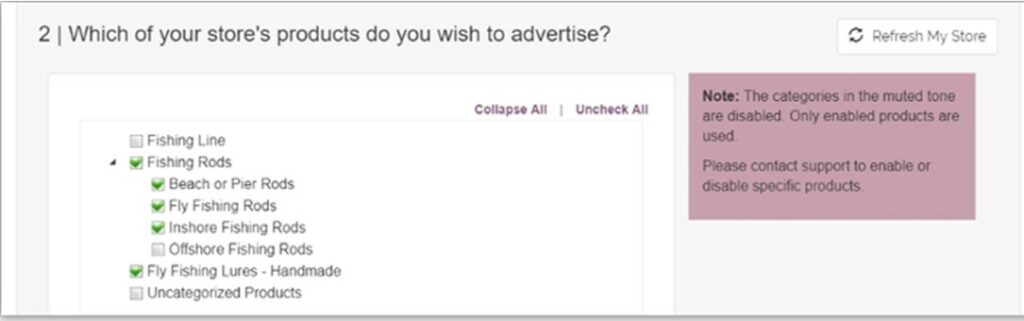
After you install and activate it, you can set up a campaign and select which product categories you want to upload as ads. The plugin will let you know if any information is missing.
Once you download the extension, you need to create an account and give permission to Google Ads to create, launch, and manage Google Ads campaign.
Then, you are taken to the campaign building process where you choose your goals, targeting options, categories of products, and a campaign review. There you can check for any errors or add tax or shipping settings for your products. Lastly, your ads need to be verified before Google will start showing the ads to the people that are searching for your keywords.
However, one of the drawbacks of the plugin is that you have to decide between 4 predefined budgets for your campaign ($150/month, $300/month, $500/month, and $1000/month).
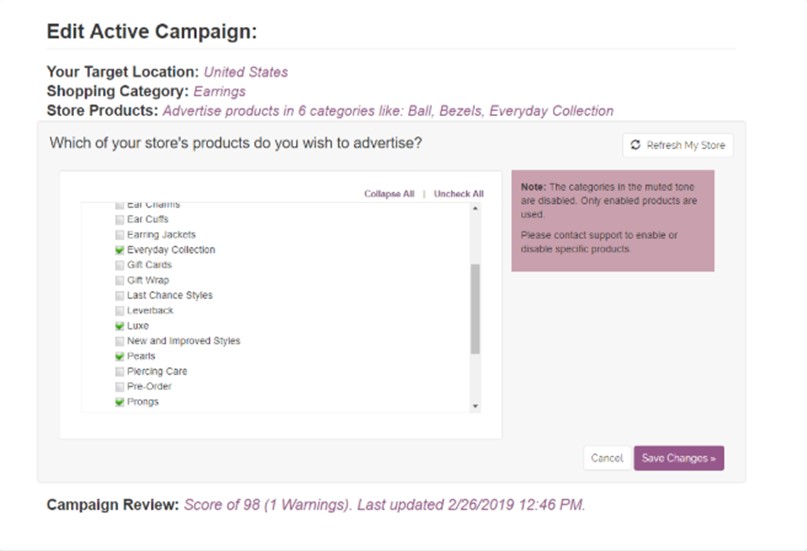
When it comes to managing campaigns, you can make changes as your goals change or progress. You can pick locations where you want to show your products, pick a different product category, or change the categories you are using to show your products. You can also change the information about your product, such as the name, title, description and you can make these changes under Google Shopping-> Manage-> Edit for the active campaign.
After some time, you can review your stats for the active campaign. You can see how much your traffic has improved (if at all) and see how much sales you have generated. On your dashboard, you can see your analytics and see the statistics at different campaign levels (if you have more) and product levels. That way you can clearly see what is working, what is not, and what should be changed.
And if you decide to redirect some of the traffic, you can quickly do that with WP 301 Redirects plugin that will help you.
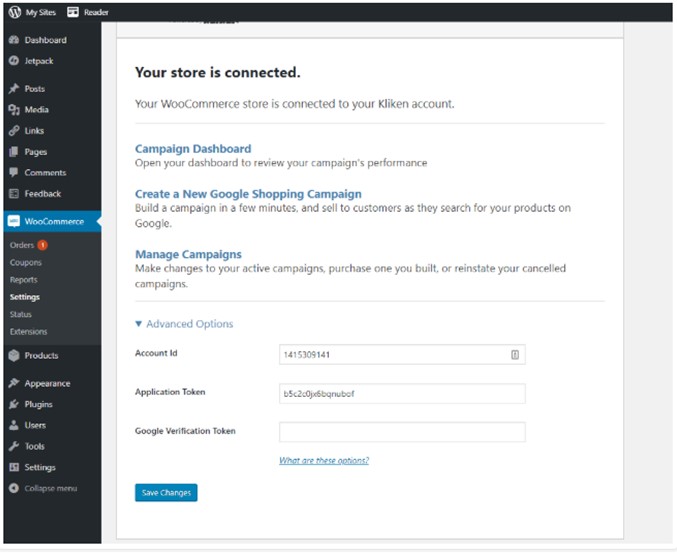
This option gives you some advanced settings, if you think you need them. This includes changing what store is connected to your Google Ads account or changing what website is connected to your Google Ads account. However, there are three advanced settings that should not really be changed, unless you are instructed to do so. This includes your account ID, which is created once you make the account, your application token that is used to connect your account and store to the system, and the Google Verification token used to verify your website for Google. It is installed as an HTML meta tag on your site and tells Google you are the authored owner of your URL.
The third step is to configure your shopping campaign. On our dashboard, go to Pending Tasks and hit Continue.
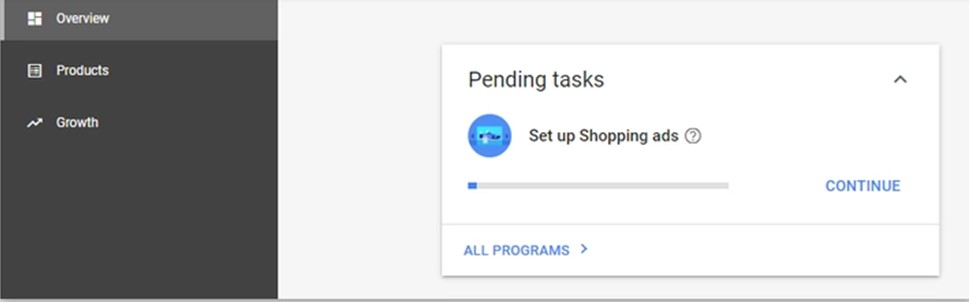
Next, select what products you want to show. You also need to set up your tax and shipping info, add product data (title, price, description), and remember to provide an URL.
The possible benefits of using Google Shopping Ads are huge. You can control the product information that is displayed to make it easier for your customer to find the product they want and make a purchase. The ads include an image, which makes the product more likable and the visitors are more likely to buy it.
Also, since the price is already mentioned, if a user clicks on the ad you know they are definitely interested in the product. Lastly, your products can be shown on more search results, as long as you pay enough attention to the keywords you are choosing.
Keywords
Before we finish with the article, spend a lot of time thinking, brainstorming, and researching what keywords you want to use. You need to see where the competition is high or low, as well as what are the often-searched keywords related to your product.
Also, there are negative keywords you want to use. Once you select negative keywords, your products will not be shown for those searches. This lets you optimize your targeting goals and audience. You can also spend your ad revenue better this way as your products are only displayed for chosen keywords.
Conclusion
Using Google Shopping Ads lets you show and display your products under specific keywords. This lets you get more traffic, increase sales and revenue. This, including the SEO setup, can lead to more exposure. In short, here are the steps you need to follow:
- Set up a Google Merchant Center account
- Import your WooCommerce product information to Merchant Center (manually or with a plugin)
- Configure your shopping campaign
Hopefully, this article showed you step by step how to set up Google Shopping Ads and how to optimize your ads for product listings.
Already a WooCommerce store owner? Build a Mobile App to Win More Customers
Appmaker specialises in Quality and Performance guaranteed, E-Commerce Android/iOS Apps for E-Commerce Businesses. Get in touch


No Comments
Leave a comment Cancel