If your users are fond of your app, they will want to keep knowing the latest updates about your app. They’d love to know what’s new – if there are any offers and discounts, or a big sale happening. Whatever may be the cause, one thing is clear – sending relevant notifications to your users is a great way to keep them engaged in your app. Check out how you can send push notifications using Appmaker dashboard.
In this blog, we will see how this is possible with Firebase and what is the way to send a push notification to your users.
Firebase Cloud Messaging
Push notification can be sent to your users using Firebase Cloud Messaging. The best part of sending push notifications through Firebase is that you can completely control your push and send it to your target audience.
Create a Push notification
Let’s see how to send simple push notification –
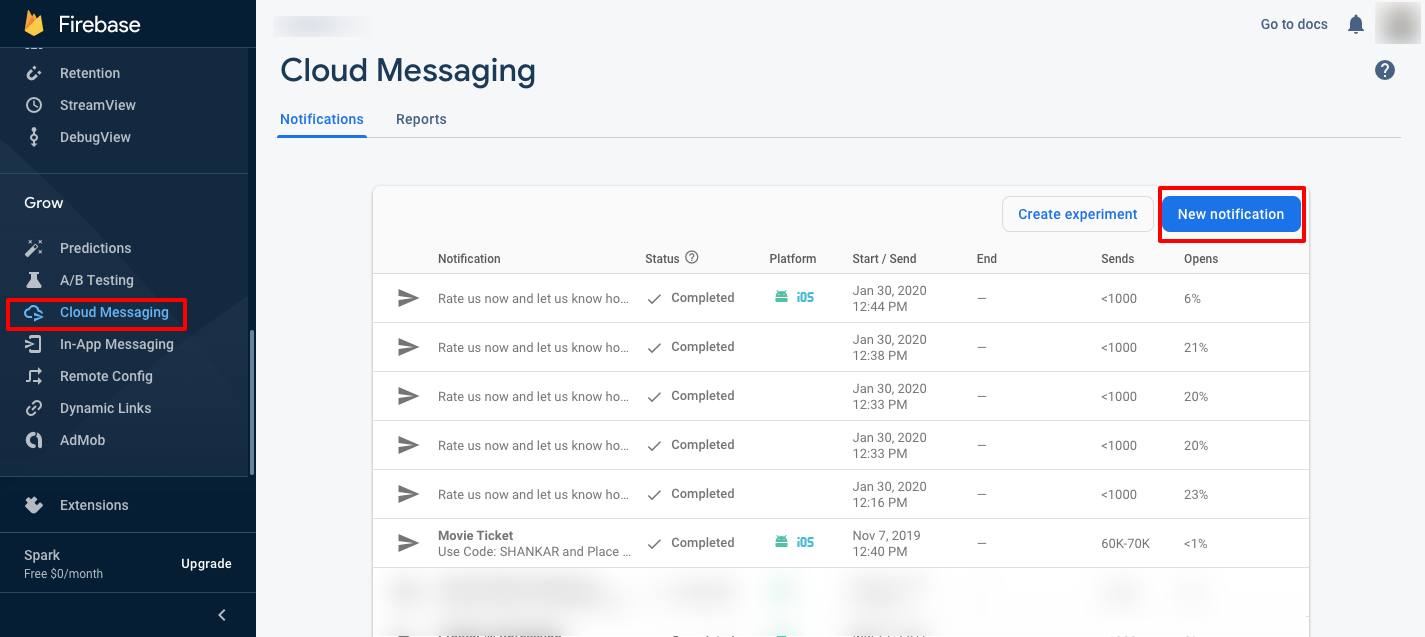
Step 1 – Go to Cloud Messaging in Firebase and click on New Notification
Step 2 – Considering you want to send a notification to your customers about the next big sale that you don’t want them to miss, type in your message in the notification text as shown below –
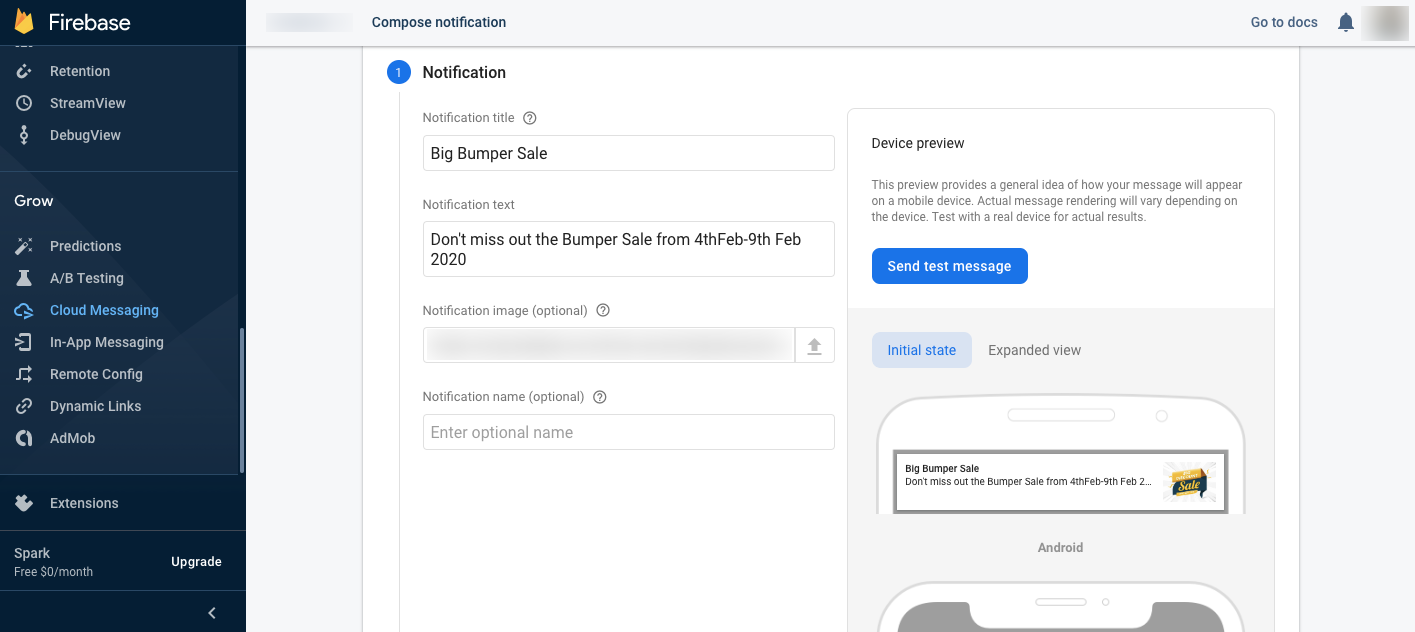
Throw in an image too if you feel that it will create an impact on your users. Adding an image is optional though. On the right side of your screen, you can preview how the notification will look on your mobile screen for both Android and iOS users. Once sure of your text, click on Next.
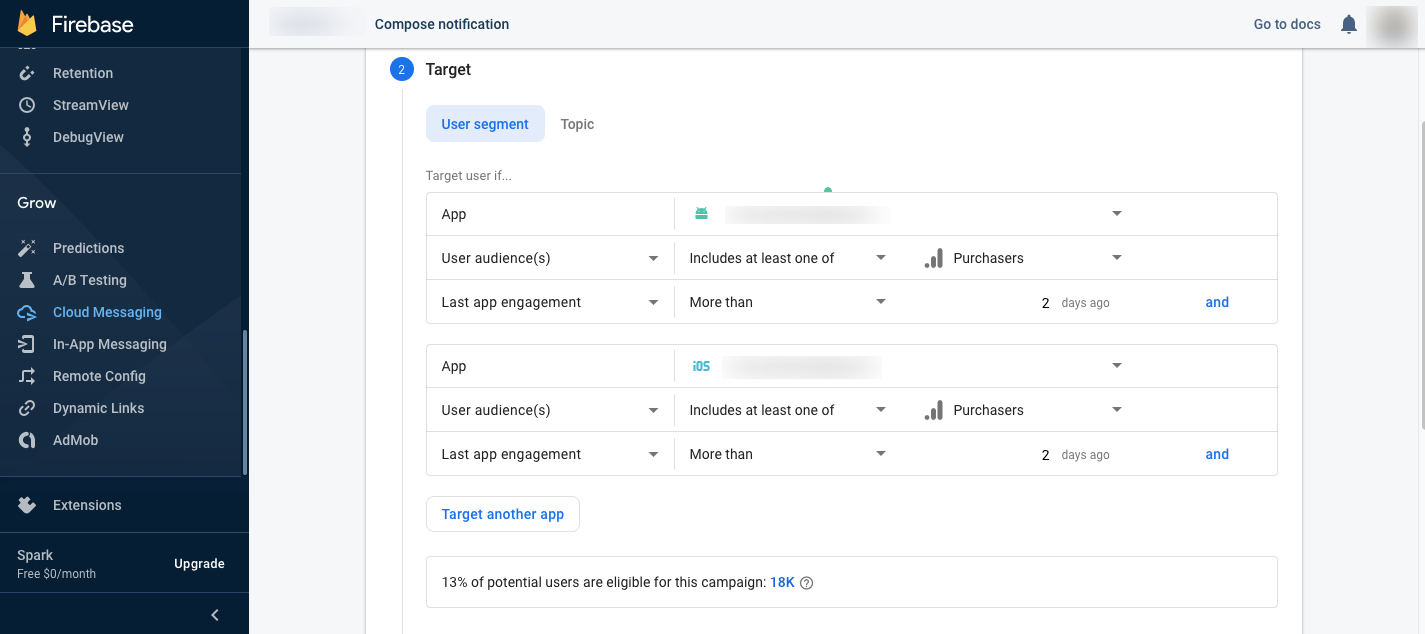
Step 3 – This is an extremely efficient step if you want to send the notification to only a targeted audience. Not everybody likes to clog their notification bar with information that is totally irrelevant to them. Create your targeted audience with this step and define the parameters.
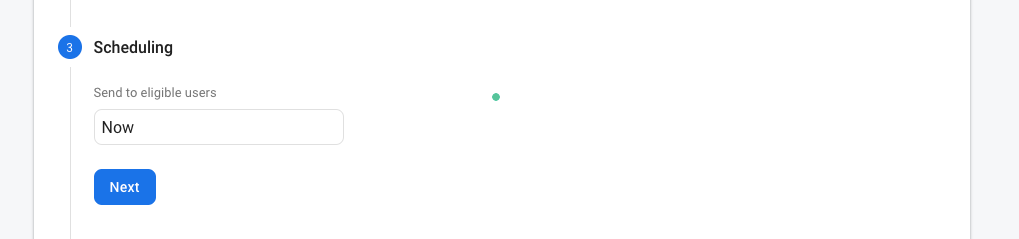
Step 4 – Schedule a timing for the notification to be sent. It will fire on its own at the decided time or you can send it right away.
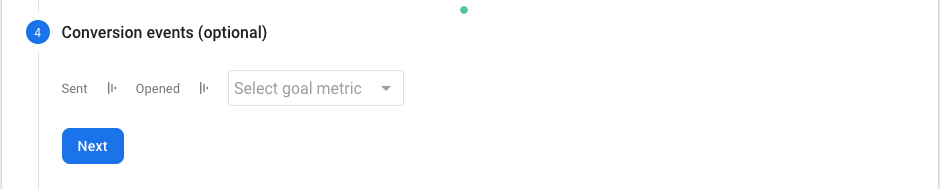
Step 5 – Define a goal metric as your conversion event to determine the results of your push notification. However, it’s optional.
To get a final read-down of your notification click on Review. Click on Publish if you are sure to send it right now.
You can track the number of sends, opens, and conversions through your notification as shown below,

That’s it, you are all set to reach your customers more effectively. Hope this blog helps you get an idea about Firebase Cloud Messaging and makes it easy for you to setup Push Notification using Google Firebase on your app.
Here is a video for you!


No Comments
Leave a comment Cancel